Tag Archives: compost

Compost This! An Update…

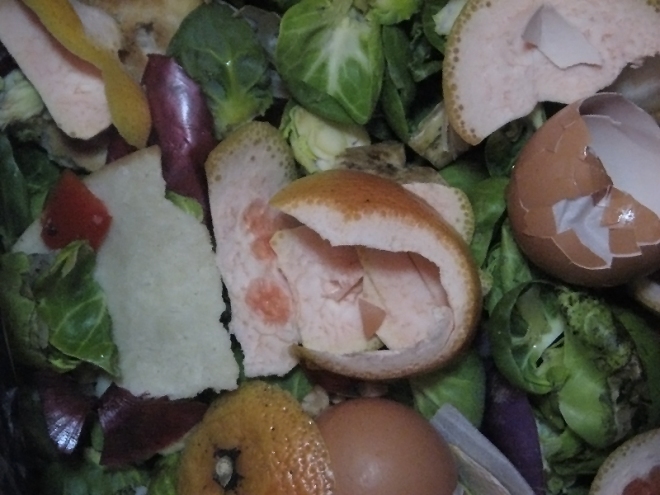
So composting at our home has been…well, I’d say it’s a definite challenge. Doable? Yes for sure. Draggin rotting stinky food on the subway or biking with it (much better option) to the nearest farmer’s market and compost disposal unit, is definitely a task. But I think it has been worth it.

Frozen compost

There has been a couple of times where we got lazy, annoyed at the stink and threw it out in the garbage…guilty! Yet every single time we have gone and dropped it off at a compost site, it has made me take a sigh of relief and accomplishment. It feels good to compost, and it feels extra nice to be good to our Earth!

Last time when we dropped off the compost, I kept noticing frozen pieces of fruit and vegetables in the decomposing piles of veggies, fruit and grains. And then it dawned on me……

Duh! Freeze it!!!! Of course! Makes total sense. You slow down the rate of decomposure by sticking your compost bin in the freezer, and it reduces the smell and the hassle of cleaning by a “Fafillion” Percent!

compost frozen

So Do it! It makes it so much easier. Now next time we go to the farmer’s market to drop it of, we won’t be gagging cleaning the bin out every time. : ) That’s nice yo…

Until the next compost update!

-Mensa

Re-potting and Re-loving your Plants

I must admit. I need to be better about taking care of our house plants. So today I got serious! I decided to re-pot them, mix the soil around, add new soil and a little home-made plant food.

The How To’s:

1.Making the Plant Food:

Since we recently started composting, I figured that instead of buying any plant food from the store, I had to put our compost to good use.

image(7)

In a blender I added some coffee grinds, a couple of eggshells, and some compost (which included apple cores, carrot peels and other goodies). I added a healthy amount of water and blended it.

A word about plant food:

Many home made recipes call for a mixture of  Epson Salts, baking powder, regular salt, and household ammonia. Whatever rocks your boat. Personally, adding ammonia, which is considered to be a toxic substance, to anything seems a little crazy to me. Its a natural and organic compound produced and used for growth of many plants, but having a jug of ammonia in the house does not seem like the best and most eco-friendly solution. (If it gets in our water ways it can be extremely harmful). So sticking with all-natural, non-toxic, home-made plant food seems like a better solution to me.

image(5)

2. Mixing the soil

I took old soil from plants that had died due to extreme heat in our kitchen (whoops) and mixed it with new soil in a bucket. I tossed it and added a bit of the juicy plant food (mostly the water part) to moisten the soil. I added more water to the mix in order to have the soil thoroughly moist.

3. Re-potting your plants

***The most important thing I did through out this whole process was talking to my plants! Call me crazy, but I really felt like they needed to know what was going on. Imagine being pulled out of your warm comfy home and abruptly placed in a new pot! So as I did this I explained the process, was really gentle, made them feel more at ease, and made ME feel like I knew what I was doing (even though it was my first real re-potting experience!)…So it helped us all : )

-Start by having everything ready and clean. I made a mess, so cleaning as you go is definitely recommended.

– Prep your flower pot with a little dirt at the bottom. If there is a hole you can cover it using a shard of an old broken pot making sure you don’t cover the hole completely. Add a bit of the plant food that you have prepared.

image(6)

-I took my first plant and flipped it gently until it loosened and came out of its pot. I dug a little around the edges and it helped to get it out. I untangled the roots a bit and watered them slightly and placed it on the pot.

-I covered and filled the pot with dirt and half way through I added a bit more of the plant food. Then I covered it completely, making sure I stayed at least half an inch from the rim (if not when you water it, it can overflow).

-Use a spray to clean the leaves of your plants if they have dirt on them, so they can breathe!

Tell your plants that they are awesome and that this is for their own good even if they hate you… ; ) Sun, water and love will make their day!

Now they will grow stronger than ever and produce beautiful blooms and strong green leaves!

-Mensa

Compost This!

Compost ItIt isn’t just about what we make, but also how we live. Por ejemplo, Mensa and I were trying to figure out a way not to put food waste in the garbage as to not attract flies or create a nesting site for said flies. We also didn’t want to have to bag up food everyday and throw it out. Then amidst the great obvious we realized we should compost. :] The next question is how to compost in a Brooklyn apartment. Let’s find out!!!

First off what can we compost? For us it will be food based only, but if you have land there are things you may compost from your garden you just need to do some research on exactly what. Okay, back to metro composting…

Things you can compost are:

  1. fruit and vegetable scraps
  2. coffee grounds and tea bags
  3. manure and bedding from animals that ONLY eat plants
  4. cut or dried flowers
  5. houseplants and potting soil
  6. sawdust and wood shavings (from untreated wood)
  7. stale beans, flour, and spices
  8. feathers
  9. breads and grains
  10. egg shells
  11. nutshells
  12. corncobs
  13. food-soiled paper towels and napkins
  14. shredded newspaper.

Some tips to good composting are add an equal amount of greens and browns to your compost bin, cut your food trash for faster composting, always maintain a top layer of browns. I said it. :]  Keep your bin moist, but not wet.  Lastly, stir well to aerate the food waste you love to call your compost.

Here is what you MAY NOT compost:

  1. meat or fish scraps
  2. cheese and dairy products
  3. fats, grease or oil
  4. cat or dog feces, kitty litter
  5. colored or glossy paper
  6. sawdust made from pressure-treated plywood or lumber
  7. coal or charcoal ashes
  8. non-compostable materials such as plastic, metals or glass
  9. diseased and/or insect-infested houseplants/soil
  10. biodegradable/compostable plastics

Now where to store it till we take it to a NYC drop off location? Ms. Mensa bought us a sealed, cubed container at the Dollar Store. Boom!

Cool Bin
Artist Rendering of Our Dollar Store Compost Bin

Another option offered to New York City residents are low cost compost bins, they even have coupons for composting worms here. What???

Next, where do we bring our compost scraps once our bin is full? Here is a list of all Brooklyn drop-off locations and for those outside of the realm of Brooklyn here are food waste drop-off sites in other boroughs.

What you want to be a composting super hero??? Here is your chance to take the NYC Master Composter Certificate Course. Nice!

Alright, let’s do this!

-Mushpa