Category Archives: How-To

WWOOFing

wwoofing
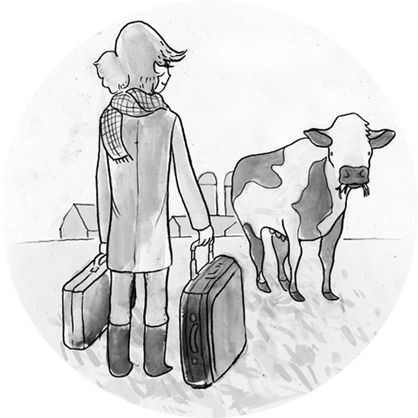
I think having a goal, and a relatively fabulous goal at that, is an important motivating force in achieving the ever elusive “success” I desire. I’ve been thinking about that a lot this week. The goal not only has to be fabulous but also realistic, which is more complicated than you may think. My goal when starting Mushpa y Mensa was solely to be able to live and work for myself on some gorgeous beach. While this is an amazing goal to have, there are no specific steps to take besides achieving success. I need more than that to motivate me. I need a “road map” to get there. What I mean is I need smaller goals to get to the big one. Then it hit me yesterday, WWOOFing!

Let me explain. I have been wanting to go WWOOFing for the last few months. Mensa had mentioned us going awhile ago and when I was younger my friend Tatia and I used to dream of living this way right after we graduated college. It never happen then, but now I know it will.

Some of you may not know what WWOOFing is so let me break it down…

WWOOF (Working Weekends on Organic Farms, as it stood for then) was born in 1971, when Sue Coppard organised a trial weekend for herself and three other Londoners on an organic farm in East Sussex. Sue arranged a deal with the farmer: they would help out with work that needed doing on the land in exchange for food and accommodation. The weekend was so successful that it became a regular trip, every third weekend.

News gradually spread of ‘Sue Coppard’s Land Army’, and other organic farms got in touch, all keen to offer their hospitality in exchange for help from willing volunteers.

Today, WWOOF stands for World Wide Opportunities on Organic Farms: a truly global phenomenon with over 6,000 hosts in 100 countries.

WWOOF UK became a charity in 2008.  With well over 560 hosts in the UK and membership rising sharply year on year, it can’t be long before the verb ‘to wwoof’ makes it into the Oxford English Dictionary. [source]

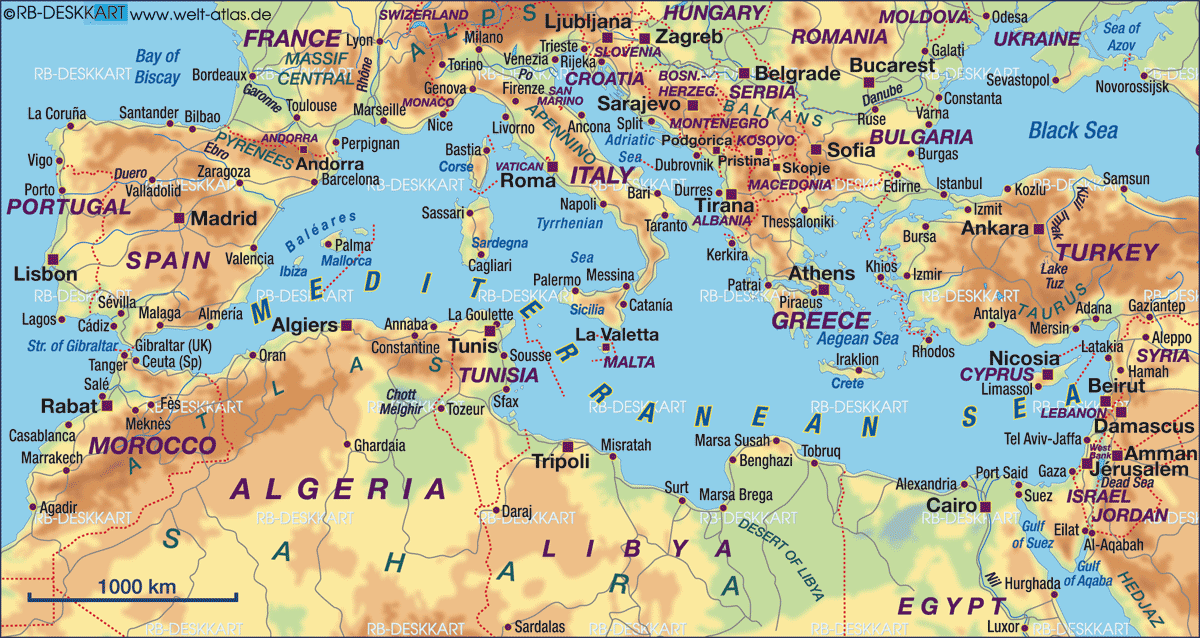
First part of goal done, thinking of a goal, WWOOFing. Next where to WWOOF; a pretty obvious choice, the Mediterranean, Spain, France, Italy, Greece. Next, what do we have to do to get ourselves onto an organic farm? The answer, we must contact the host farmers off of a list you have access to online once you become a member of each country’s WWOOFing chapter. What I realized is if we are going in a year we need to start to get everything set up now. It is like 30 Euros for us to dual register and like I said they are all separate, yearly memberships. That actually works perfect as if we are really going in a year we will have to contact the farmers ourselves a few months in advance and we won’t want to have to pay $160 again to get the latest list off their sites. Next, how long will we WWOOF for? I thought 2 months, Mensa said 6. The site says people usually only do it for 2 weeks. I think once we get the membership and reach out to the farmers we will have a better idea of how long we will go. I am sure there are multiple farms in the Mediterranean region of Spain, France, Italy, and Greece. I guess we could do 2 weeks at 3 farms per region. :] Ah, I forgot to mention there is no money involve, so you need to save money for fun and necessary products. Once, we find out where we are going and what is really included (room and food), we should be able to come up with our budget and then save this year. There is also insurance the hosts have for you, but remember it is only if something happens to you on the farm. If you are injured off the farm it’s on you, so you may want to have additional insurance if you don’t already.
Mediterranean
On Spain’s WWOOFing site they give this advice,

Insurance for wwofers registered at WWOOF ESPAÑA just covers accidents or illness (and death) direct consequence of an accident while helping in the farm. But for example you are not insured while outside the farm or even in the case of an appendicitis (because it´s not resulting from an accident). The amount insured is small: between 3000 and 6000 euros as maximum compensation). If you get injured, just contact us, you don´t need to do anything special, because you are already registered with us in our insurance policy.

Unfortunately in 2008 we had a sad incident in which a wwoofer died while taking a bath, outside the farm. We all got shocked by the sad accident of Adrian, but upon all the grief, we sadly confirmed the insurance did not cover that case and the expenses of reparation were very high. We never think about these fatalities, but they do happen. Please be responsible.

As a wwoofer I highly recommend you look at www.oveuropa.com. In their special insurance for wwoofers, they have additional clauses and it´s very convenient for the price, this could be on top of your own insurance. [source]

This is an attainable dream and seeing it here in front of me I know it is not only possible, but not that complicated. I want to travel, I want to learn more about organic farming, meet new people, escape a desk job and really just live the way I want to and I’ve found a way to do it, so why wouldn’t I?

-Mushpa

Oh-Organic Marshmallow Fondant, Where art thou?

Feliz cumpleaños Micaca y Isabela!!!

This birthday cake is dedicated to my crazy cool sister who turned the double douces a week ago…An easy to make fondant added a little color to this delicious chocolate cake, and who doesn’t love fondant? You can really make anything you want with it because its almost like play-dough!

The fondant was ridiculously easy to make, and because of the hype with the marshmallow-fondant recipe, I got caught up in the moment and used ingredients that were not so wholesome for our health. So sorry hermana!

image-2

So the ingredients I used?

Marshmallows= High Fructose Corn Syrup and who knows what  bits and pieces of chicken parts…

Powdered Sugar= I didn’t use any organic or unbleached product…my bad.

Food Coloring= Need I say more?

So here’s the deal. I did a little research and Organic Marshmallow Fondant IS possible.

I found a couple of recipes, yet each of them always had something “off”. So i combined all my research and I think it will be as easy to make an organic fondant recipe without the extra hassle.

So here’s the recipe…

8 oz of mini VEGAN marshmallows (about 4 full cups). They do exist!

1 tbsp of water

1 pound bag of Wholesome Organic Icing Sugar..plus a little bit more for when things get sticky!

1 tbsp of Organic Light corn syrup

1 tbsp of lemon juice

Natural Food Coloring

Organic Butter

* For the Food Coloring there are MANY options. You can buy organic and natural good coloring like Maggie’s Naturals which are made of all natural plant based sources. Your local natural food store should carry some. If you want to experiment and make your own colors you can virtually achieve any of them with any product at the store. Red? Use some beets! Orange? Carrots! Yellow? Tumeric or saffron flowers. Green? You can use spinach or even buy a natural food supplement called liquid chlorophyll. Blues and Purples? Cabbage anyone? Its doable! You might just have to experiment with the recipe.

image-5

The HOW TO:

Add the water to the marshmallows. It usually calls for a minute in the microwave. Skip this step and the extra radiation and heat it the old school way. I will update this recipe when I try it in the oven, but I would start by testing it at 300 degrees for about 10 minutes in a bowl.

Use a WOODEN SPOON covered with butter. This will make the marshmallows stick less to everything and will make it easier to mix. Make sure all the clumps are gone until you have a pretty smooth marshmallow mixture, and add the corn syrup and the lemon. The corn syrup helps make it a bit more flexible so it does not crack and dry so fast, while the lemon reduces the intense sweetness it has.

Start adding the icing sugar bit by bit, and continue mixing it well into the marshmallow mix. Slowly it will start to clump up and it will become hard to keep going further with the spoon. Once you have gone through 3/4 of the sugar, you can transfer the mix to a clean surface and use your hands.

Knead and keep adding the powdered sugar until you have a smooth and malleable dough. If it’s too sticky add a bit of sugar, if it’s too dry then splash water into your hands and knead again.

To prevent it from sticking to the table and the rolling pin, I greased the surfaces with a bit of butter which made things much easier.

image-3

I made some flowers and leaves. Pretty easy! For the leaves I just cut two different shapes and with a toothpick added the lines. For the flowers I used a long flat triangle and started to curl it up from the smallest end. The colors look extremely bright, because they are extremely fake.

So now that I have the recipe and sources, I will make a second attempt to live to what I preach, and make a HEALTHIER and more CONSCIOUS birthday cake, with beautiful organic and natural colors!

image-7

 -Mensa

Re-potting and Re-loving your Plants

I must admit. I need to be better about taking care of our house plants. So today I got serious! I decided to re-pot them, mix the soil around, add new soil and a little home-made plant food.

The How To’s:

1.Making the Plant Food:

Since we recently started composting, I figured that instead of buying any plant food from the store, I had to put our compost to good use.

image(7)

In a blender I added some coffee grinds, a couple of eggshells, and some compost (which included apple cores, carrot peels and other goodies). I added a healthy amount of water and blended it.

A word about plant food:

Many home made recipes call for a mixture of  Epson Salts, baking powder, regular salt, and household ammonia. Whatever rocks your boat. Personally, adding ammonia, which is considered to be a toxic substance, to anything seems a little crazy to me. Its a natural and organic compound produced and used for growth of many plants, but having a jug of ammonia in the house does not seem like the best and most eco-friendly solution. (If it gets in our water ways it can be extremely harmful). So sticking with all-natural, non-toxic, home-made plant food seems like a better solution to me.

image(5)

2. Mixing the soil

I took old soil from plants that had died due to extreme heat in our kitchen (whoops) and mixed it with new soil in a bucket. I tossed it and added a bit of the juicy plant food (mostly the water part) to moisten the soil. I added more water to the mix in order to have the soil thoroughly moist.

3. Re-potting your plants

***The most important thing I did through out this whole process was talking to my plants! Call me crazy, but I really felt like they needed to know what was going on. Imagine being pulled out of your warm comfy home and abruptly placed in a new pot! So as I did this I explained the process, was really gentle, made them feel more at ease, and made ME feel like I knew what I was doing (even though it was my first real re-potting experience!)…So it helped us all : )

-Start by having everything ready and clean. I made a mess, so cleaning as you go is definitely recommended.

– Prep your flower pot with a little dirt at the bottom. If there is a hole you can cover it using a shard of an old broken pot making sure you don’t cover the hole completely. Add a bit of the plant food that you have prepared.

image(6)

-I took my first plant and flipped it gently until it loosened and came out of its pot. I dug a little around the edges and it helped to get it out. I untangled the roots a bit and watered them slightly and placed it on the pot.

-I covered and filled the pot with dirt and half way through I added a bit more of the plant food. Then I covered it completely, making sure I stayed at least half an inch from the rim (if not when you water it, it can overflow).

-Use a spray to clean the leaves of your plants if they have dirt on them, so they can breathe!

Tell your plants that they are awesome and that this is for their own good even if they hate you… ; ) Sun, water and love will make their day!

Now they will grow stronger than ever and produce beautiful blooms and strong green leaves!

-Mensa