Category Archives: Food

Making some Organic Mayo….with Coconut Oil

We bought a jar of coconut oil at the super-market the other day.

It was a bit hard to find a good use for it because even after trying some recipes, it of course didn’t behave like the olive oil which we use regularly.

I did use it as a hair mask, which was nice, but there was still a lot left on the jar….

So out came the idea to make Mayo with coconut oil. I looked up some recipes and it is totally possible and doable.

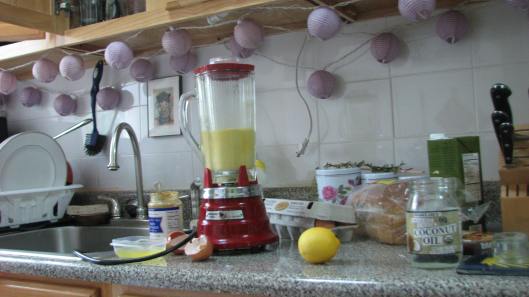
homemade coconut oil mayo

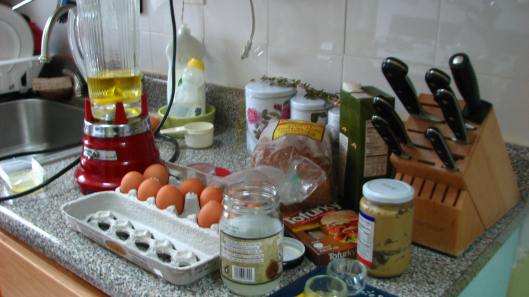
We used…..

  • 1 whole egg
  • 2 egg yolks
  • 1 tablespoon of fancy mustard
  • 1/2 a lemon’s juicy juice
  • a good pinch of salt
  • some pepper
  • 1/2 cup of Organic Coconut Oil
  • 1/2 cup of nice Extra Virgin Olive Oil

Disclaimer.… if this is your first time making mayo (like it was mine), be careful and do it EXACTLY as the instructions tell you… After you learn, then you can experiment. I  should have done so…


homemade coconut oil mayo

Do the following:

  • Mix your two oils together.
  • In a food processor, blender or bowl (if you are hand whipping with a whisk grandma-style) mix the eggs, yolks, mustard, lemon juice and condiments.
  • After all is nice and even start adding DROPS of oil to your mixture and continue the blending and whisking process. *** this is where I messed up***…If you add the oil too fast, the mixture will curdle and you’ll end up with oily egg juice… So sad.
  • Keep adding drops until it turns a lighter color…you will be able to tell if they start mixing well.
  • SLOWLY add little streams of oil and continue to blend…and just keep doing it slowly, oh so patiently…
  • After you are almost done with the oil (about 1/4 cup left) you can speed it up a bit if using a blender, and add the rest of the oil. It should start to become a heavier mixture….continue on until its silky smooth.
  • Let it set for 30 minutes in the fridge.

homemade coconut oil mayo013-06-25 12.09.14

*** IF YOU MESS UP***

I saw many posts and recipes say how you could not save your mixture if it curdled….NOT TRUE!  You can mess up and still have delicious mayo!

Since I had done it the first time in the blender and messed up, I decided to hand-whip it.

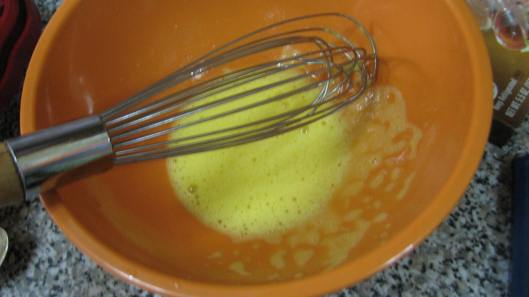
homemade coconut oil mayo

I added another egg yolk in a bowl and whipped it….and to that base I started to add the droplets of the curdled mix slowly, whipping it by hand. I followed the instructions clearly this time, and poured the messed up mixture in without having to throw it away! And it worked!

FANTABULOUS Home-made, coconut oil mayonnaise.

Since it’s home-made, with NO preservatives and whack ingredients, it only keeps in the fridge for about two weeks or less….but its worth it!

YUMMMM……

-Mensa
Compost This! An Update…

So composting at our home has been…well, I’d say it’s a definite challenge. Doable? Yes for sure. Draggin rotting stinky food on the subway or biking with it (much better option) to the nearest farmer’s market and compost disposal unit, is definitely a task. But I think it has been worth it.

Frozen compost

There has been a couple of times where we got lazy, annoyed at the stink and threw it out in the garbage…guilty! Yet every single time we have gone and dropped it off at a compost site, it has made me take a sigh of relief and accomplishment. It feels good to compost, and it feels extra nice to be good to our Earth!

Last time when we dropped off the compost, I kept noticing frozen pieces of fruit and vegetables in the decomposing piles of veggies, fruit and grains. And then it dawned on me……

Duh! Freeze it!!!! Of course! Makes total sense. You slow down the rate of decomposure by sticking your compost bin in the freezer, and it reduces the smell and the hassle of cleaning by a “Fafillion” Percent!

compost frozen

So Do it! It makes it so much easier. Now next time we go to the farmer’s market to drop it of, we won’t be gagging cleaning the bin out every time. : ) That’s nice yo…

Until the next compost update!

-Mensa

“Queen of The Sun: What are Bees Telling Us?”

queen of the sun

In the fall of 2006, newspapers around the United States began to publicize a unnerving phenomenon. Honeybees were a mysteriously disappearing from beehives all around the nation. Dave Hackenburg, a outspoken beekeeper, and the first to raise a stir about the crisis, reported that bees were simply vanishing from his hives. That fall, beekeepers and commercial beekeeping enterprises around the country reported losses of 30% with some beekeepers reporting losses up to 90% of all of their colonies.

I want to post a quick review about this wonderful documentary, Queen of the Sun: What are Bees Telling Us?, and just an overall shout out to the hard workers who keep us fed and alive…The Bees in our world!

It is incredible how much I learned yesterday watching this, and it’s also a bit chilling to know that these little animals are at incredible risk of disappearing from this earth, and even more daunting, our system of agriculture disappearing with them. Meaning, we are at risk as well. Our whole ecosystem actually!

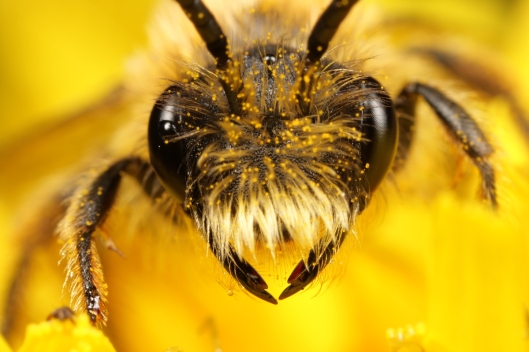
2439460646_e9fe39207f_o

From how bees choose their beekeepers, to laws banning communities from bee-keeping, to the mass production and mass destruction of honey and bees, this film really shines a light on these little workers that pollinate and do so much for us. Of course, it forms a full circle and goes back to the root of many of our agricultural conundrums in our world: Massive industrial agriculture and factory farming and how it is destroying our world. Can you believe that factory farmers actually feed CORN SYRUP to the producers of honey!?!?!  I found this disgusting, outrageous, and it hurt me so much.

So what to do to help bees? The producers, filmmakers and beekeepers that put together this film have given us helpful things that we can do to keep this beautiful little creatures in our world today. So let’s get started!

queen of the bees 

 1. PLANT BEE FRIENDLY FLOWERS AND FLOWERING HERBS IN YOUR BACKYARD  

Bees are losing habitat all around the world due to intensive monoculture-based farming practices, pristine green (but flower-barren) sprawling suburban lawns and from the destruction of native landscapes. Just planting flowers in your garden, yard, or in a planter will help provide bees with forage. Avoid chemically treating your flowers as chemicals can leach into pollen and negatively affect the bees systems. Plant plenty of the same type of bloom together, bees like volume of forage (a sq. yard is a good estimate).

Here are a few examples of good plant varieties: Spring – lilacs, penstemon, lavender, sage, verbena, and wisteria. Summer – Mint, cosmos, squash, tomatoes, pumpkins, sunflowers, oregano, rosemary, poppies, black-eyed Susan, passion flower vine, honeysuckle. Fall – Fuschia, mint, bush sunflower, sage, verbena, toadflax. For a great list of plants honeybees love click here

——-

2. WEEDS CAN BE A GOOD THING

Contrary to popular belief, a lawn full of clover and dandelions is not just a good thing—it’s a great thing! A haven for honeybees (and other native pollinators too). Don’t be so nervous about letting your lawn live a little. Wildflowers, many of which we might classify as weeds, are some of the most important food sources for native North American bees. If some of these are “weeds” you chose to get rid of (say you want to pull out that blackberry bush that’s taking over), let it bloom first for the bees and then before it goes to seed, pull it out or trim it back!

 ——-

3. DON’T USE CHEMICALS OR PESTICIDES TO TREAT YOUR GARDEN 

Yes, they make your lawn look pristine and pretty, but they’re actually doing the opposite to the life in your biosphere. The chemicals and pest treatments you put on your lawn and garden can cause damange to the honeybees systems. These treatments are especially damaging if applied while the flowers are in bloom as they will get into the pollen and nectar and be taken back to the bee hive where they also get into the honey—which in turn means they can get into us. Pesticides, specifically neo-nicotinoid varieties have been one of the major culprits in Colony Collapse Disorder.

——-

4. BUY LOCAL, RAW HONEY

The honey you buy directly sends a message to beekeepers about how they should keep their bees. For this reason, and for your own personal health, strive to buy local, raw honey that is from hives that are not treated by chemicals. It can be hard to find out what is truly “local” and truly “raw”–and even harder yet to find out what is untreated. Here’s a few guidelines: If you find it in the grocery store and it’s imported from China, don’t buy it. There have been a number of cases recently of chemically contaminated honey coming from China. If it’s coming from the grocery store, but it doesn’t say the words “pure” or “raw” and you can’t read in the description that it’s untreated by chemicals, don’t buy it. If it’s untreated, the label will say, as this is an important selling point. We recommend a simple solution for most people. Go to your farmer’s market and shake hands with the beekeepers you meet. There are beekeepers at nearly every farmer’s market selling their honey and other products. Have a conversation with them, find out what they are doing to their hives, and how they are keeping their bees. If they are thoughtful, respectful beekeepers who keep their bees in a sustainable, natural way, then make a new friend and support them!

——-

5. BEES ARE THIRSTY. PUT A SMALL BASIN OF WATER OUTSIDE YOUR HOME

You may not have known this one—but it’s easy and it’s true! If you have a lot of bees starting to come to your new garden of native plants, wildflowers and flowering herbs, put a little water basin out (a bird bath with some stones in it for them to crawl on does a nice trick). They will appreciate it!

——- 

6.BUY LOCAL, ORGANIC FOOD FROM A FARMER THAT YOU KNOW

What’s true for honey generally holds true for the rest of our food. Buying local means eating seasonally as well, and buying local from a farmer that you know means you know if that food is coming from a monoculture or not. This is much easier in the summer when you can get your fresh produce from a local farmer’s market. Another option is to get your food from a local CSA (Community Supported Agriculture) Farm. Keep in mind, USDA Organic Certification can be expensive and you may find many great farmers and beekeepers with excellent food and honey that isn’t USDA certified simply because they don’t produce a high quantity or opt for the expense of certification. Don’t let this get in the way of supporting them and if you’re worried about their products—have a conversation with them.  (Note – A huge challenge for beekeepers is to keep their bees in an area where there is no chemical spray within 3 miles, as this is really what is required to guarantee truly organic honey. All the more reason for us all to avoid the use of harsh chemicals.)

——- 

7. LEARN HOW TO BE A BEEKEEPER WITH SUSTAINABLE PRACTICES

Look up a local bee association that offers classes with natural approaches in your community and link up. Visit our resources & links page to start reading and exploring first steps!

——-

8. UNDERSTAND THAT HONEYBEES AREN’T OUT TO GET YOU

Honeybees are vegetarians. They want to forage pollen and nectar from flowers up to three miles from their hive and bring that food back to provide food for themselves and the beehive. Contrary to what the media might have us believe, they are not out to sting us. Here are a few tips to avoid getting stung. 1. Stay still and calm if a bee is around you or lands on you. Many bees will land on you and sniff you out. They can smell the pheromones that come with fear and anger it can be a trigger for them to sting you. 2. Don’t stand in front of a hive opening, or a pathway to a concentration of flowers. Bees are busy running back and forth from the hive, and if you don’t get in their way, they won’t be in yours. 3. Learn to differentiate between honeybees and wasps. Honeybees die after they sting humans (but not after they sting other bees!), wasps do not. Wasps are carnivores, so they like your lunch-meats and soda. Honeybees are vegetarians. For a quick lesson on their differences click here.

——-

 9. SHARE SOLUTIONS WITH OTHERS IN YOUR COMMUNITY 

There are so many fun ways to help and be a voice for the bees. Share about the importance of bees at local community meetings, at conferences, in schools and universities, and on on-line message boards and forums. Let them know about QUEEN OF THE SUN and other great media out there that is in support of the honeybee.

Invite your friends and family to attend a screening of QUEEN OF THE SUN in your area. Find screening locations. – (You can also see it on Netflix “Watch it Now”.) Be part of our Community Screening Campaign by hosting a house-party or larger screening in your area! Click here to learn more.-If you are part of an educational institution, ask your institution to purchase an Educational DVD of QUEEN OF THE SUN (available HERE)

 queen of the sun
Let’s Bee Bee-utiful!
: D
– Mensa

WWOOFing

wwoofing
I think having a goal, and a relatively fabulous goal at that, is an important motivating force in achieving the ever elusive “success” I desire. I’ve been thinking about that a lot this week. The goal not only has to be fabulous but also realistic, which is more complicated than you may think. My goal when starting Mushpa y Mensa was solely to be able to live and work for myself on some gorgeous beach. While this is an amazing goal to have, there are no specific steps to take besides achieving success. I need more than that to motivate me. I need a “road map” to get there. What I mean is I need smaller goals to get to the big one. Then it hit me yesterday, WWOOFing!

Let me explain. I have been wanting to go WWOOFing for the last few months. Mensa had mentioned us going awhile ago and when I was younger my friend Tatia and I used to dream of living this way right after we graduated college. It never happen then, but now I know it will.

Some of you may not know what WWOOFing is so let me break it down…

WWOOF (Working Weekends on Organic Farms, as it stood for then) was born in 1971, when Sue Coppard organised a trial weekend for herself and three other Londoners on an organic farm in East Sussex. Sue arranged a deal with the farmer: they would help out with work that needed doing on the land in exchange for food and accommodation. The weekend was so successful that it became a regular trip, every third weekend.

News gradually spread of ‘Sue Coppard’s Land Army’, and other organic farms got in touch, all keen to offer their hospitality in exchange for help from willing volunteers.

Today, WWOOF stands for World Wide Opportunities on Organic Farms: a truly global phenomenon with over 6,000 hosts in 100 countries.

WWOOF UK became a charity in 2008.  With well over 560 hosts in the UK and membership rising sharply year on year, it can’t be long before the verb ‘to wwoof’ makes it into the Oxford English Dictionary. [source]

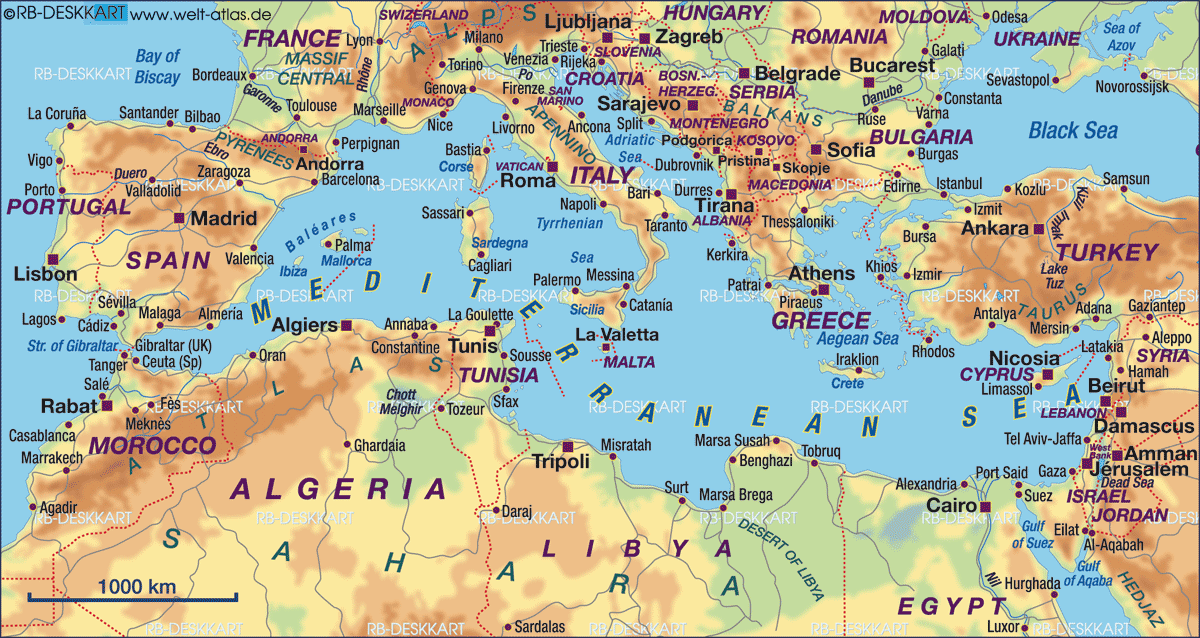
First part of goal done, thinking of a goal, WWOOFing. Next where to WWOOF; a pretty obvious choice, the Mediterranean, Spain, France, Italy, Greece. Next, what do we have to do to get ourselves onto an organic farm? The answer, we must contact the host farmers off of a list you have access to online once you become a member of each country’s WWOOFing chapter. What I realized is if we are going in a year we need to start to get everything set up now. It is like 30 Euros for us to dual register and like I said they are all separate, yearly memberships. That actually works perfect as if we are really going in a year we will have to contact the farmers ourselves a few months in advance and we won’t want to have to pay $160 again to get the latest list off their sites. Next, how long will we WWOOF for? I thought 2 months, Mensa said 6. The site says people usually only do it for 2 weeks. I think once we get the membership and reach out to the farmers we will have a better idea of how long we will go. I am sure there are multiple farms in the Mediterranean region of Spain, France, Italy, and Greece. I guess we could do 2 weeks at 3 farms per region. :] Ah, I forgot to mention there is no money involve, so you need to save money for fun and necessary products. Once, we find out where we are going and what is really included (room and food), we should be able to come up with our budget and then save this year. There is also insurance the hosts have for you, but remember it is only if something happens to you on the farm. If you are injured off the farm it’s on you, so you may want to have additional insurance if you don’t already.
Mediterranean
On Spain’s WWOOFing site they give this advice,

Insurance for wwofers registered at WWOOF ESPAÑA just covers accidents or illness (and death) direct consequence of an accident while helping in the farm. But for example you are not insured while outside the farm or even in the case of an appendicitis (because it´s not resulting from an accident). The amount insured is small: between 3000 and 6000 euros as maximum compensation). If you get injured, just contact us, you don´t need to do anything special, because you are already registered with us in our insurance policy.

Unfortunately in 2008 we had a sad incident in which a wwoofer died while taking a bath, outside the farm. We all got shocked by the sad accident of Adrian, but upon all the grief, we sadly confirmed the insurance did not cover that case and the expenses of reparation were very high. We never think about these fatalities, but they do happen. Please be responsible.

As a wwoofer I highly recommend you look at www.oveuropa.com. In their special insurance for wwoofers, they have additional clauses and it´s very convenient for the price, this could be on top of your own insurance. [source]

This is an attainable dream and seeing it here in front of me I know it is not only possible, but not that complicated. I want to travel, I want to learn more about organic farming, meet new people, escape a desk job and really just live the way I want to and I’ve found a way to do it, so why wouldn’t I?

-Mushpa

Oh-Organic Marshmallow Fondant, Where art thou?

Feliz cumpleaños Micaca y Isabela!!!

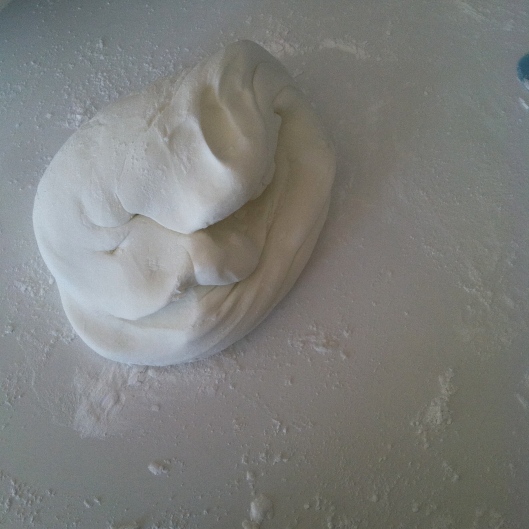
This birthday cake is dedicated to my crazy cool sister who turned the double douces a week ago…An easy to make fondant added a little color to this delicious chocolate cake, and who doesn’t love fondant? You can really make anything you want with it because its almost like play-dough!

The fondant was ridiculously easy to make, and because of the hype with the marshmallow-fondant recipe, I got caught up in the moment and used ingredients that were not so wholesome for our health. So sorry hermana!

image-2

So the ingredients I used?

Marshmallows= High Fructose Corn Syrup and who knows what  bits and pieces of chicken parts…

Powdered Sugar= I didn’t use any organic or unbleached product…my bad.

Food Coloring= Need I say more?

So here’s the deal. I did a little research and Organic Marshmallow Fondant IS possible.

I found a couple of recipes, yet each of them always had something “off”. So i combined all my research and I think it will be as easy to make an organic fondant recipe without the extra hassle.

So here’s the recipe…

8 oz of mini VEGAN marshmallows (about 4 full cups). They do exist!

1 tbsp of water

1 pound bag of Wholesome Organic Icing Sugar..plus a little bit more for when things get sticky!

1 tbsp of Organic Light corn syrup

1 tbsp of lemon juice

Natural Food Coloring

Organic Butter

* For the Food Coloring there are MANY options. You can buy organic and natural good coloring like Maggie’s Naturals which are made of all natural plant based sources. Your local natural food store should carry some. If you want to experiment and make your own colors you can virtually achieve any of them with any product at the store. Red? Use some beets! Orange? Carrots! Yellow? Tumeric or saffron flowers. Green? You can use spinach or even buy a natural food supplement called liquid chlorophyll. Blues and Purples? Cabbage anyone? Its doable! You might just have to experiment with the recipe.

image-5

The HOW TO:

Add the water to the marshmallows. It usually calls for a minute in the microwave. Skip this step and the extra radiation and heat it the old school way. I will update this recipe when I try it in the oven, but I would start by testing it at 300 degrees for about 10 minutes in a bowl.

Use a WOODEN SPOON covered with butter. This will make the marshmallows stick less to everything and will make it easier to mix. Make sure all the clumps are gone until you have a pretty smooth marshmallow mixture, and add the corn syrup and the lemon. The corn syrup helps make it a bit more flexible so it does not crack and dry so fast, while the lemon reduces the intense sweetness it has.

Start adding the icing sugar bit by bit, and continue mixing it well into the marshmallow mix. Slowly it will start to clump up and it will become hard to keep going further with the spoon. Once you have gone through 3/4 of the sugar, you can transfer the mix to a clean surface and use your hands.

Knead and keep adding the powdered sugar until you have a smooth and malleable dough. If it’s too sticky add a bit of sugar, if it’s too dry then splash water into your hands and knead again.

To prevent it from sticking to the table and the rolling pin, I greased the surfaces with a bit of butter which made things much easier.

image-3

I made some flowers and leaves. Pretty easy! For the leaves I just cut two different shapes and with a toothpick added the lines. For the flowers I used a long flat triangle and started to curl it up from the smallest end. The colors look extremely bright, because they are extremely fake.

So now that I have the recipe and sources, I will make a second attempt to live to what I preach, and make a HEALTHIER and more CONSCIOUS birthday cake, with beautiful organic and natural colors!

image-7

 -Mensa

Easy Hummus Yummus Recipe! (Without Tahini)

Sunday morning I cleaned my kitchen and realized I had a can of garbanzo beans in the pantry…So what can I make? Well what else but HUMMUS!

I looked up a couple of recipes and realized that one of the main ingredients, tahini (sesame paste), was not in my pantry…

So I IMPROVISED! And it turned out better than delicious!

This is an easy recipe for a home-made hummus. I usually eat it with carrots, sugar snap peas and crunchy anything. The combination is the best!

IMG_1992

Here it is:

-1 can of garbanzo beans

-1 lemon for its tangy juice (use less depending on your liking…I ❤ lemons!)

-salty salt (about a teaspoon or more also depending on your tastebuds)

– Olive Oil

– a little cumin

-1 tablespoon or so of pine nuts (These replaced the sesame seeds/tahini)

-1 clove of garlic

Add garbanzo beans (making sure you drain all the extra water from the can), about a teaspoon of salt, a good two tablespoons of olive oil, the garlic, a couple of “shakes” of cumin, and the pine nuts all in a food processor. You can also use a blender of course, as long as you blend it to a smooth consistency. I eye-balled the recipe, so amounts are about what I think I put in. A little more, a little less will only make it YOUR hummus recipe :]

IMG_1983

I tasted it and thought it needed a bit more olive oil, so as it blended I poured a bit more in to give it texture. I transferred it to my own tub and now I have hummus for the week!

And it only took about 10 minutes!

First time hummus making…a delicious SUCCESS!

-Mensa